


Zisterne 5.0 SPIFFS + FTP Server (Daten auf einem FTP Server ablegen)
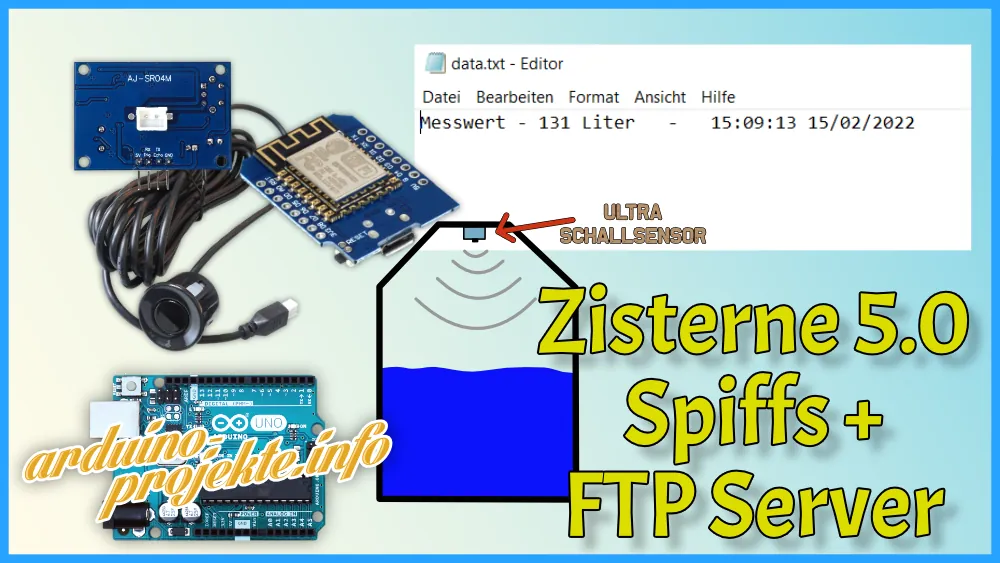
In diesem Blogbeitrag geht es darum wie man die Messdaten von dem Ultraschallsensor auf einem FTP Server (z.B. eine Fritz Box) ablegen kann. Das System ist geeignet für User die keine Datenbank auf bauen wollen oder können und den ESP im DeepSleep mit Akku betreiben wollen.
Funktionsweise:
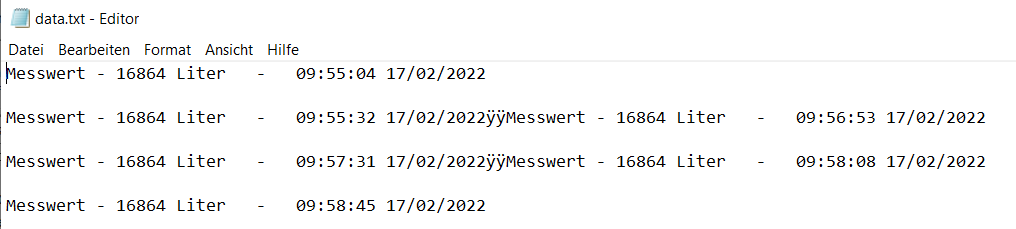
Ein Datei wird erstellt und mit den Messdaten und Datum/ Uhrzeit gefüllt. Datum und Uhrzeit werden von einem Zeitserver aus dem Internet geholt. Diese wird auf dem Spiffs der ESP abgelegt. Im Anschluss wird die Datei auf einem FTP Server abgeleht.
Der ESP8266 egal welche Version, haben einen Speicherplatz auf dem Chip wo man Daten ablegen und abrufen kann. Könne Ihr hier nachlesen. https://arduino-esp8266.readthedocs.io/en/latest/filesystem.html
Das werden wir hier benutzen um die Bilder und die HTML Seite dort abzulegen.
					|--------------|-------|---------------|--|--|--|--|--|
^              ^       ^               ^     ^
Sketch    OTA update   File system   EEPROM  WiFi config (SDK)
| Board | Flash chip size, bytes | File system size, bytes |
|---|---|---|
| Generic module | 512k | 64k, 128k |
| Generic module | 1M | 64k, 128k, 256k, 512k |
| Generic module | 2M | 1M |
| Generic module | 4M | 1M, 2M, 3M |
| Adafruit HUZZAH | 4M | 1M, 2M, 3M |
| ESPresso Lite 1.0 | 4M | 1M, 2M, 3M |
| ESPresso Lite 2.0 | 4M | 1M, 2M, 3M |
| NodeMCU 0.9 | 4M | 1M, 2M, 3M |
| NodeMCU 1.0 | 4M | 1M, 2M, 3M |
| Olimex MOD-WIFI-ESP8266(-DEV) | 2M | 1M |
| SparkFun Thing | 512k | 64k |
| SweetPea ESP-210 | 4M | 1M, 2M, 3M |
| WeMos D1 R1, R2 & mini | 4M | 1M, 2M, 3M |
| ESPDuino | 4M | 1M, 2M, 3M |
| WiFiduino | 4M | 1M, 2M, 3M |
Was wird für das Projekt benötigt.
1. Installation ESP8266 in der Arduino IDE
2. Filesystem Uploader Plugin (SPIFFS)
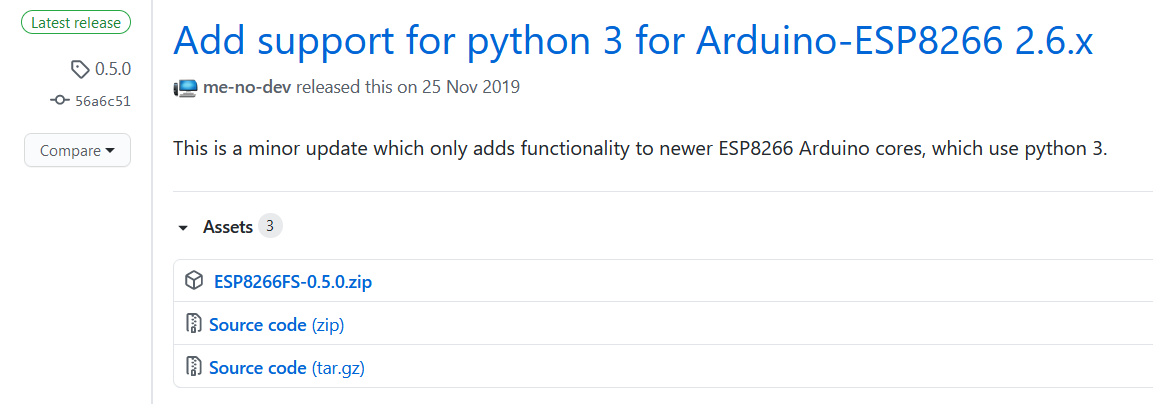
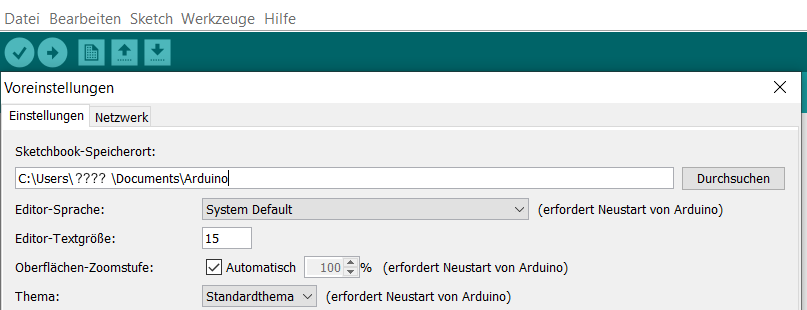
Den Inhalt der ZIP Datei kopiert ihr in den Tools Ordner.
C:\Program Files (x86)\Arduino\tools
oder in diesen, das ist egal.
C:\Users\???\Documents\Arduino\tools

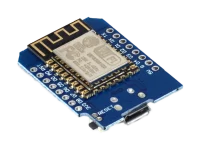
Welche Bauteile werden benötigt.
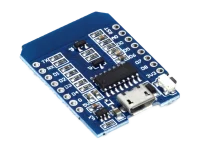
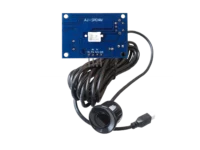

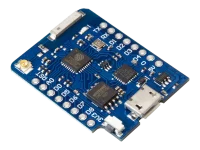
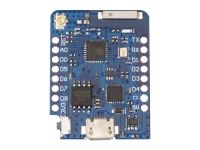
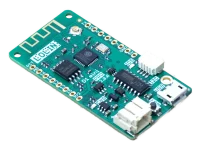
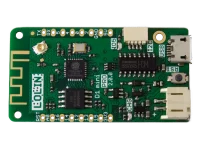
Schema

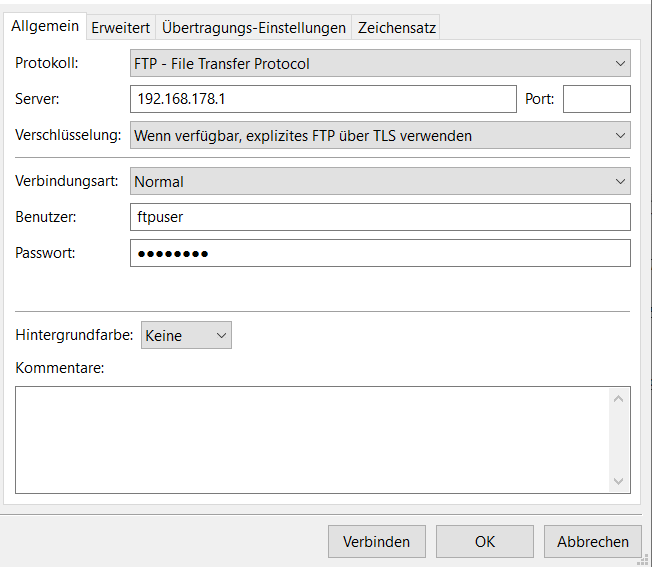
FTP Einstellung (Fritz Box)
Bei der Fritz Box ist Standardmäßig so, dass der FTP Server aktiv ist. Hier müsst Ihr euch einen Benutzer anlegen, damit Ihr auf den FTP Server drauf kommt.
Dazu meldet Ihr euch bei euer Fritz Box an unter http://fritz.box oder http://192.168.178.1/ . Dann in System -> FRITZ!Box-Benutzer und hier einen Benutzer anlegen. Die IP Adresse für den FTP Server ist dann die selbe wie für den Login.

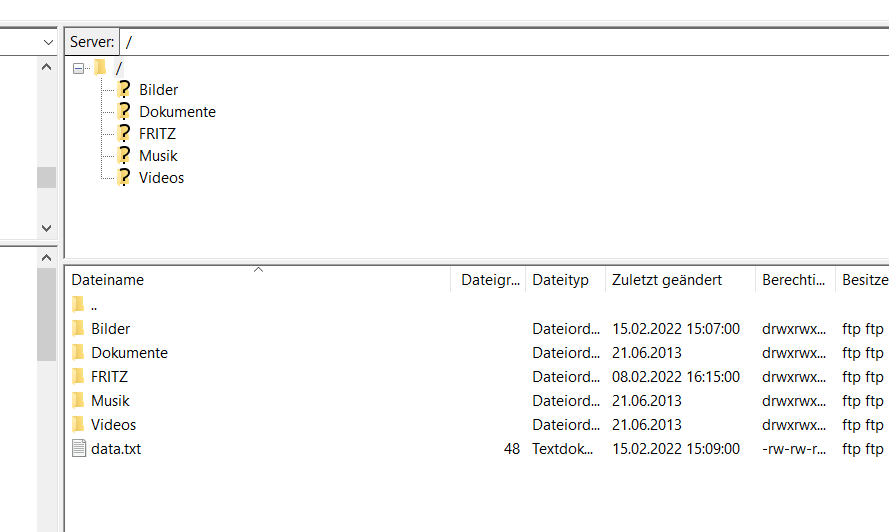
Vielleicht testet Ihr eure FTP Einstellung in dem Ihr mit einem FTP Client mal auf die Fritz Box zugreift. Ich benutze hier FileZilla.
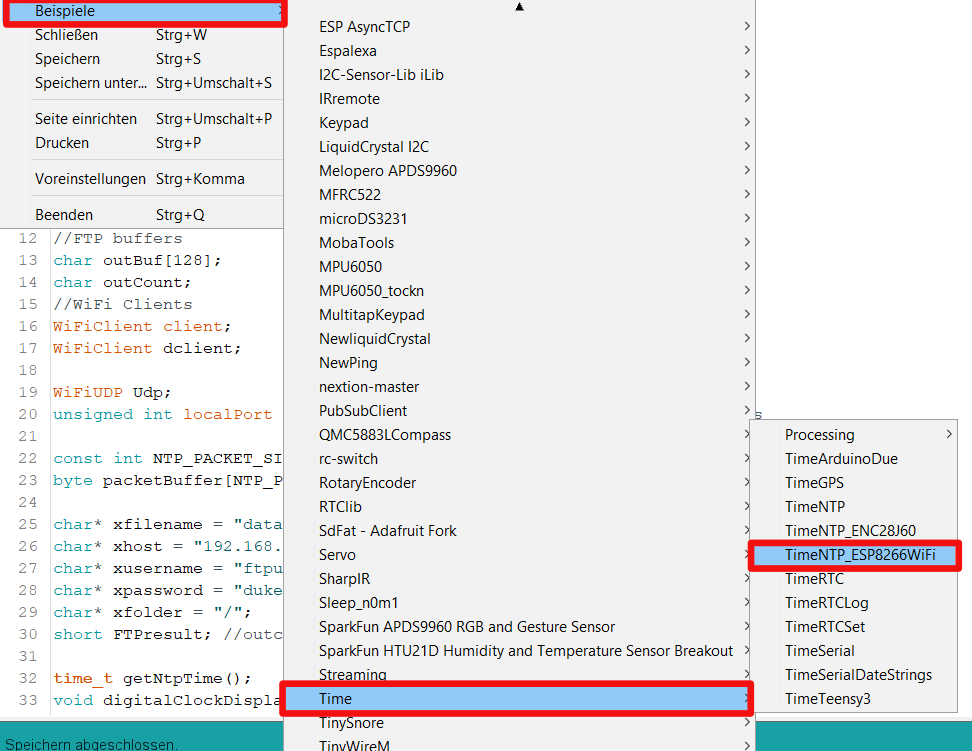
Der Programmcode
					#include <FS.h>
#include <TimeLib.h>
#include <ESP8266WiFi.h>
#include <WiFiUdp.h>
//Wlan settings
const char *ssid = "WLAN NAME";
const char *pass = "WLAN PASSWORD";

const int sleepSeconds = 30;
const int timeZone = 1;     // Central European Time

int trigger = 12;   // D6
int echo = 13;      // D7
long dauer = 0;
long entfernung = 0;

//FTP buffers
char outBuf[128];
char outCount;

//WiFi Clients
WiFiUDP Udp;
unsigned int localPort = 8888;  // local port to listen for UDP packets

static const char ntpServerName[] = "us.pool.ntp.org";
const int NTP_PACKET_SIZE = 48; // NTP time is in the first 48 bytes of message
byte packetBuffer[NTP_PACKET_SIZE]; //buffer to hold incoming & outgoing packets

//FTP settings
char* FTPfilename = "data.txt";
char* FTPhost = "192.168.178.1"; //Fritz Box
char* FTPusername = "FTP USER NAME";
char* FTPpassword = "FTP PASSWORD";
char* FTPfolder = "/";
short FTPresult; //outcome of FTP upload

time_t getNtpTime();
void digitalClockDisplay();
void printDigits(int digits);
void sendNTPpacket(IPAddress &address);
short doFTP(char* , char* , char* , char* , char* = "");

void setup() {
  Serial.begin(115200);
  pinMode(trigger, OUTPUT);
  pinMode(echo, INPUT);
  Serial.print("Connecting to ");
  Serial.println(ssid);
  WiFi.begin(ssid, pass);

  while (WiFi.status() != WL_CONNECTED) {
    delay(500);
    Serial.print(".");
  }
  //SPIFF setup
  SPIFFS.begin();
  Serial.print("IP number assigned by DHCP is ");
  Serial.println(WiFi.localIP());
  Serial.println("Starting UDP");
  Udp.begin(localPort);
  Serial.print("Local port: ");
  Serial.println(Udp.localPort());
  Serial.println("waiting for sync");
  setSyncProvider(getNtpTime);
  setSyncInterval(300);
}

time_t prevDisplay = 0; // when the digital clock was displayed

void loop()
{
  digitalWrite(trigger, LOW);
  delayMicroseconds(2);
  digitalWrite(trigger, HIGH);
  delayMicroseconds(10);
  digitalWrite(trigger, LOW);
  dauer = pulseIn(echo, HIGH);
  entfernung = (dauer / 2) / 29.1;
  entfernung = 199 - entfernung;
  entfernung = entfernung * 84.7457;

  //Get the time from the NTP server
  setSyncProvider(getNtpTime);
  Serial.println("1) NTP GOTTEN");

    File f = SPIFFS.open(FTPfilename, "w");    // Öffnet die Datei, w überscheibt alles, a fügt Datensätze hinzu
    if (!f) {
      Serial.println("file open failed");
    }
    else {
      Serial.println("2) FILE OPENED");
      f.print("Messwert - ");
      f.print(entfernung);
      f.print(" Liter   -   ");

      //This section puts the date and time into the data file
      if (hour() < 10) {
        f.print("0");
        f.print(hour());
      }
      else {
        f.print(hour());
      }
      printDigits(minute(), f);
      printDigits(second(), f);
      f.print(" ");
      if (day() < 10) {
        f.print("0");
        f.print(day());
      }
      else {
        f.print(day());
      }
      f.print("/");
      if (month() < 10) {
        f.print("0");
        f.print(month());
      }
      else {
        f.print(month());
      }
      f.print("/");
      f.print(year());
      f.println();
      f.close();
      Serial.println("3) FILE PRINTED AND CLOSED");
      //Attempt FTP upload
      FTPresult = doFTP(FTPhost, FTPusername, FTPpassword, FTPfilename, FTPfolder);
      //What is the outcome?
      Serial.println("A return code of 226 is success");
      Serial.print("Return code = ");
      Serial.println(FTPresult);
    }

  Serial.println("4) GOING TO SLEEP");
  delay(2000);
  ESP.deepSleep(sleepSeconds * 1000000, WAKE_RF_DEFAULT);
}

short doFTP(char* host, char* uname, char* pwd, char* fileName, char* folder)
{
  WiFiClient ftpclient;
  WiFiClient ftpdclient;

  const short FTPerrcode = 400; //error codes are > 400
  const byte Bufsize = 128;
  char outBuf[Bufsize];
  short FTPretcode = 0;
  const byte port = 21; //21 is the standard connection port

  File ftx = SPIFFS.open(fileName, "r"); //file to be transmitted
  if (!ftx) {
    Serial.println(F("file open failed"));
    return 900;
  }
  if (ftpclient.connect(host, port)) {
    Serial.println(F("Connected to FTP server"));
  }
  else {
    ftx.close();
    Serial.println(F("Failed to connect to FTP server"));
    return 910;
  }
  FTPretcode = eRcv(ftpclient, outBuf, Bufsize);
  if (FTPretcode >= 400) return FTPretcode;

  /* User - Authentication username
     Send this command to begin the login process. username should be a
     valid username on the system, or "anonymous" to initiate an anonymous login.
  */
  ftpclient.print("USER ");
  ftpclient.println(uname);
  FTPretcode = eRcv(ftpclient, outBuf, Bufsize);
  if (FTPretcode >= 400) return FTPretcode;

  /* PASS - Authentication password
     After sending the USER command, send this command to complete
     the login process. (Note, however, that an ACCT command may have to be
     used on some systems, not needed with synology diskstation)
  */
  ftpclient.print("PASS ");
  ftpclient.println(pwd);
  FTPretcode = eRcv(ftpclient, outBuf, Bufsize);
  if (FTPretcode >= 400) return FTPretcode;

  //CWD - Change the working folder on the FTP server
  if (!(folder == "")) {
    ftpclient.print("CWD ");
    ftpclient.println(folder);
    FTPretcode = eRcv(ftpclient, outBuf, Bufsize);
    if (FTPretcode >= 400) {
      return FTPretcode;
    }
  }

  /* SYST - Returns a word identifying the system, the word "Type:",
     and the default transfer type (as would be set by the
     TYPE command). For example: UNIX Type: L8 - this is what
     the diskstation returns
  */
  ftpclient.println("SYST");
  FTPretcode = eRcv(ftpclient, outBuf, Bufsize);
  if (FTPretcode >= 400) return FTPretcode;

  /* TYPE - sets the transfer mode
     A - ASCII text
     E - EBCDIC text
     I - image (binary data)
     L - local format
     for A & E, second char is:
     N - Non-print (not destined for printing). This is the default if
     second-type-character is omitted
     Telnet format control (<CR>, <FF>, etc.)
     C - ASA Carriage Control
  */
  ftpclient.println("Type I");
  FTPretcode = eRcv(ftpclient, outBuf, Bufsize);
  if (FTPretcode >= 400) return FTPretcode;

  /* PASV - Enter passive mode
     Tells the server to enter "passive mode". In passive mode, the server
     will wait for the client to establish a connection with it rather than
     attempting to connect to a client-specified port. The server will
     respond with the address of the port it is listening on, with a message like:
     227 Entering Passive Mode (a1,a2,a3,a4,p1,p2), e.g. from diskstation
     Entering Passive Mode (192,168,0,5,217,101)
  */
  ftpclient.println("PASV");
  FTPretcode = eRcv(ftpclient, outBuf, Bufsize);
  if (FTPretcode >= 400) return FTPretcode;
  /* This is parsing the return from the server
     where a1.a2.a3.a4 is the IP address and p1*256+p2 is the port number.
  */
  char *tStr = strtok(outBuf, "(,"); //chop the output buffer into tokens based on the delimiters
  int array_pasv[6];
  for ( int i = 0; i < 6; i++) { //there are 6 elements in the address to decode
    tStr = strtok(NULL, "(,"); //1st time in loop 1st token, 2nd time 2nd token, etc.
    array_pasv[i] = atoi(tStr); //convert to int, why atoi - because it ignores any non-numeric chars
    //after the number
    if (tStr == NULL) {
      Serial.println(F("Bad PASV Answer"));
    }
  }
  //extract data port number
  unsigned int hiPort, loPort;
  hiPort = array_pasv[4] << 8; //bit shift left by 8
  loPort = array_pasv[5] & 255; //bitwise AND
  Serial.print(F("Data port: "));
  hiPort = hiPort | loPort; //bitwise OR
  Serial.println(hiPort);
  //first instance of dftp
  if (ftpdclient.connect(host, hiPort)) {
    Serial.println(F("Data port connected"));
  }
  else {
    Serial.println(F("Data connection failed"));
    ftpclient.stop();
    ftx.close();
  }

  /* STOR - Begin transmission of a file to the remote site. Must be preceded
     by either a PORT command or a PASV command so the server knows where
     to accept data from
  */
  ftpclient.print("STOR ");
  ftpclient.println(fileName);
  FTPretcode = eRcv(ftpclient, outBuf, Bufsize);
  if (FTPretcode >= 400) {
    ftpdclient.stop();
    return FTPretcode;
  }
  Serial.println(F("Writing..."));

  byte clientBuf[64];
  int clientCount = 0;

  while (ftx.available()) {
    clientBuf[clientCount] = ftx.read();
    clientCount++;
    if (clientCount > 63) {
      ftpdclient.write((const uint8_t *)clientBuf, 64);
      clientCount = 0;
    }
  }
  if (clientCount > 0) ftpdclient.write((const uint8_t *)clientBuf, clientCount);
  ftpdclient.stop();
  Serial.println(F("Data disconnected"));
  FTPretcode = eRcv(ftpclient, outBuf, Bufsize);
  if (FTPretcode >= 400) {
    return FTPretcode;
  }

  //End the connection
  ftpclient.println("QUIT");
  ftpclient.stop();
  Serial.println(F("Disconnected from FTP server"));

  ftx.close();
  Serial.println(F("File closed"));
  return FTPretcode;
} // end function doFTP
/*------------------------------------------------------
   FUNCTION - eRcv
   Reads the response from an FTP server and stores the
   output in a buffer.Extracts the server return code from
   the buffer.

   Parameters passed:
     aclient - a wifi client connected to FTP server and
     delivering the server response
     outBuf - a buffer to store the server response on
     size - size of the buffer in bytes

   Return codes:
      These are the first three chars in the buffer and are
      defined in
      https://en.wikipedia.org/wiki/List_of_FTP_server_return_codes

   Dependencies:
     Libraries - <ESP8266WiFi.h> wifi library
     Functions - none
  --------------------------------------------------------*/
short eRcv(WiFiClient aclient, char outBuf[], int size)
{
  byte thisByte;
  char index;
  String respStr = "";
  while (!aclient.available()) delay(1);
  index = 0;
  while (aclient.available()) {
    thisByte = aclient.read();
    Serial.write(thisByte);
    if (index < (size - 2)) { //less 2 to leave room for null at end
      outBuf[index] = thisByte;
      index++;
    }
  } //note if return from server is > size it is truncated.
  outBuf[index] = 0; //putting a null because later strtok requires a null-delimited string
  //The first three bytes of outBuf contain the FTP server return code - convert to int.
  for (index = 0; index < 3; index++) {
    respStr += (char)outBuf[index];
  }
  return respStr.toInt();
} // end function eRcv

void digitalClockDisplay()
{
  // digital clock display of the time
  Serial.print(hour());
  printDigits(minute());
  printDigits(second());
  Serial.print(" ");
  Serial.print(day());
  Serial.print(".");
  Serial.print(month());
  Serial.print(".");
  Serial.print(year());
  Serial.println();
}

void printDigits(int digits, File f) {
  // utility for digital clock display: prints preceding colon and leading 0
  f.print(":");
  if (digits < 10)
    f.print('0');
  f.print(digits);
}

/*-------- NTP code ----------*/

time_t getNtpTime()
{
  IPAddress ntpServerIP; // NTP server's ip address

  while (Udp.parsePacket() > 0) ; // discard any previously received packets
  Serial.println("Transmit NTP Request");
  // get a random server from the pool
  WiFi.hostByName(ntpServerName, ntpServerIP);
  Serial.print(ntpServerName);
  Serial.print(": ");
  Serial.println(ntpServerIP);
  sendNTPpacket(ntpServerIP);
  uint32_t beginWait = millis();
  while (millis() - beginWait < 1500) {
    int size = Udp.parsePacket();
    if (size >= NTP_PACKET_SIZE) {
      Serial.println("Receive NTP Response");
      Udp.read(packetBuffer, NTP_PACKET_SIZE);  // read packet into the buffer
      unsigned long secsSince1900;
      // convert four bytes starting at location 40 to a long integer
      secsSince1900 =  (unsigned long)packetBuffer[40] << 24;
      secsSince1900 |= (unsigned long)packetBuffer[41] << 16;
      secsSince1900 |= (unsigned long)packetBuffer[42] << 8;
      secsSince1900 |= (unsigned long)packetBuffer[43];
      return secsSince1900 - 2208988800UL + timeZone * SECS_PER_HOUR;
    }
  }
  Serial.println("No NTP Response :-(");
  return 0; // return 0 if unable to get the time
}

// send an NTP request to the time server at the given address
void sendNTPpacket(IPAddress &address)
{
  // set all bytes in the buffer to 0
  memset(packetBuffer, 0, NTP_PACKET_SIZE);
  // Initialize values needed to form NTP request
  // (see URL above for details on the packets)
  packetBuffer[0] = 0b11100011;   // LI, Version, Mode
  packetBuffer[1] = 0;     // Stratum, or type of clock
  packetBuffer[2] = 6;     // Polling Interval
  packetBuffer[3] = 0xEC;  // Peer Clock Precision
  // 8 bytes of zero for Root Delay & Root Dispersion
  packetBuffer[12] = 49;
  packetBuffer[13] = 0x4E;
  packetBuffer[14] = 49;
  packetBuffer[15] = 52;
  // all NTP fields have been given values, now
  // you can send a packet requesting a timestamp:
  Udp.beginPacket(address, 123); //NTP requests are to port 123
  Udp.write(packetBuffer, NTP_PACKET_SIZE);
  Udp.endPacket();
}
					#include <FS.h>
#include <TimeLib.h>
#include <ESP8266WiFi.h>
#include <WiFiUdp.h>
					const char *ssid = "WLAN NAME";
const char *pass = "WLAN PASSWORD";
					const int sleepSeconds = 30;  // DeepSleep 30 Sekunden
const int timeZone = 1;     // Central European Time

int trigger = 12;   // D6
int echo = 13;      // D7
long dauer = 0;
long entfernung = 0;

//FTP buffers
char outBuf[128];
char outCount;

//WiFi Clients
WiFiUDP Udp;
unsigned int localPort = 8888;  // local port to listen for UDP packets

static const char ntpServerName[] = "us.pool.ntp.org";
const int NTP_PACKET_SIZE = 48; // NTP time is in the first 48 bytes of message
byte packetBuffer[NTP_PACKET_SIZE]; //buffer to hold incoming & outgoing packets

//FTP settings
char* FTPfilename = "data.txt";
char* FTPhost = "192.168.178.1"; //Fritz Box
char* FTPusername = "ftpuser";
char* FTPpassword = "duke123+";
char* FTPfolder = "/";
short FTPresult; //outcome of FTP upload

time_t getNtpTime();
void digitalClockDisplay();
void printDigits(int digits);
void sendNTPpacket(IPAddress &address);
short doFTP(char* , char* , char* , char* , char* = "");
Im Setup Teil gibt es nicht viel zu sagen. Es wird das WLAN, Spiffs, UPD und die Zeit aktiviert. Das UPD und setSyncProvider wird für Datum und Uhrzeit aus dem Internet benötigt.
					void setup() {
  Serial.begin(115200);
  pinMode(trigger, OUTPUT);
  pinMode(echo, INPUT);
  Serial.print("Connecting to ");
  Serial.println(ssid);
  WiFi.begin(ssid, pass);

  while (WiFi.status() != WL_CONNECTED) {
    delay(500);
    Serial.print(".");
  }
  //SPIFF setup
  SPIFFS.begin();
  Serial.print("IP number assigned by DHCP is ");
  Serial.println(WiFi.localIP());
  Serial.println("Starting UDP");
  Udp.begin(localPort);
  Serial.print("Local port: ");
  Serial.println(Udp.localPort());
  Serial.println("waiting for sync");
  setSyncProvider(getNtpTime);
  setSyncInterval(300);
}
					void loop()
{
  digitalWrite(trigger, LOW);
  delayMicroseconds(2);
  digitalWrite(trigger, HIGH);
  delayMicroseconds(10);
  digitalWrite(trigger, LOW);
  dauer = pulseIn(echo, HIGH);
  entfernung = (dauer / 2) / 29.1;
  entfernung = 199 - entfernung;
  entfernung = entfernung * 84.7457;
Das ist nun der Multiplikator aus der Sketch.
entfernung= entfernung* 84.7457;
					  //Get the time from the NTP server
  setSyncProvider(getNtpTime);
In diesem Bereich wird die Datei data.txt geöffnet. Das a gibt an wie die Datei beschrieben werden soll. a=fügt Datensätze hinzu und w=Überschreibt alle Daten, so das immer nur 1 Messwert in der Datei steht. Das müsst Ihr entscheiden was Ihr wollt. Welche Befehle Ihr für das Spiffs verwendet, könnt Ihr hier nachlesen. https://arduino-esp8266.readthedocs.io/en/latest/filesystem.html
Im Anschluss wird der Messwert + Datum und Uhrzeit in die Datei geschrieben und geschlossen. Zu diesem Zeitpunkt leigt die Datei nur auf dem Spiffs des ESP´s
					    File f = SPIFFS.open(FTPfilename, "a");    // Öffnet die Datei, w überscheibt alles, a fügt Datensätze hinzu
    if (!f) {
      Serial.println("file open failed");
    }
    else {
      Serial.println("2) FILE OPENED");
      f.print("Messwert - ");
      f.print(entfernung);
      f.print(" Liter   -   ");

      //This section puts the date and time into the data file
      if (hour() < 10) {
        f.print("0");
        f.print(hour());
      }
      else {
        f.print(hour());
      }
      printDigits(minute(), f);
      printDigits(second(), f);
      f.print(" ");
      if (day() < 10) {
        f.print("0");
        f.print(day());
      }
      else {
        f.print(day());
      }
      f.print("/");
      if (month() < 10) {
        f.print("0");
        f.print(month());
      }
      else {
        f.print(month());
      }
      f.print("/");
      f.print(year());
      f.println();
      f.close();
FTPresault ist nur für die Ausgabe im Seriellen Monitor da. Die doFTP Funktion überträgt die Daten auf den FTP Server. Ich habe den Code hier gekürz sonst wird es zu viel, Ihr seht es ja im Sketch komplett. Im Anschluss geht der ESP in den DeepSleep für die gewünschte Zeit. Nicht vergessen damit der DeepSleep funktioniert muss RST und D0 verbunden werden. Oder wie beim Wemos D1 mini Pro v2 das Lötpad auf der Rückseite verbunden werden.

      FTPresult = doFTP(FTPhost, FTPusername, FTPpassword, FTPfilename, FTPfolder);
      Serial.println("A return code of 226 is success");
      Serial.print("Return code = ");
      Serial.println(FTPresult);
    }

  Serial.println("4) GOING TO SLEEP");
  delay(2000);
  ESP.deepSleep(sleepSeconds * 1000000, WAKE_RF_DEFAULT);
}

short doFTP(char* host, char* uname, char* pwd, char* fileName, char* folder)
{
.
}
- short eRcv(WiFiClient aclient, char outBuf[], int size)
- void digitalClockDisplay
- void printDigits(int digits, File f)
- time_t getNtpTime()
- void sendNTPpacket(IPAddress &address)
Messwerte

Upload Sketch
- Sketch -> Sketch Ordner anzeigen, und erstellte einen Ordner Names data. In diese Ordner packt Ihr eure Daten wie Bilder, HTML und CSS Datein.
- Werkzeuge –> Board, wählt euer ESP8266 Board aus was Ihr benutzt.
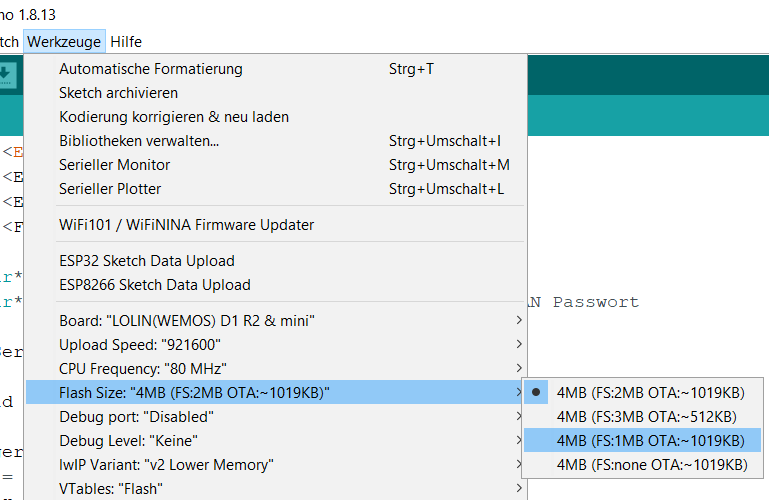
- Dann geht Ihr auf Werkzeuge –> Flash size and select 4M (FS:2MB) es kann hier auch stehen 4M (2M SPIFFS).
Hier könnt Ihr euch den Sketch runterladen.
Weitere Beträge zum Thema Zisterne:
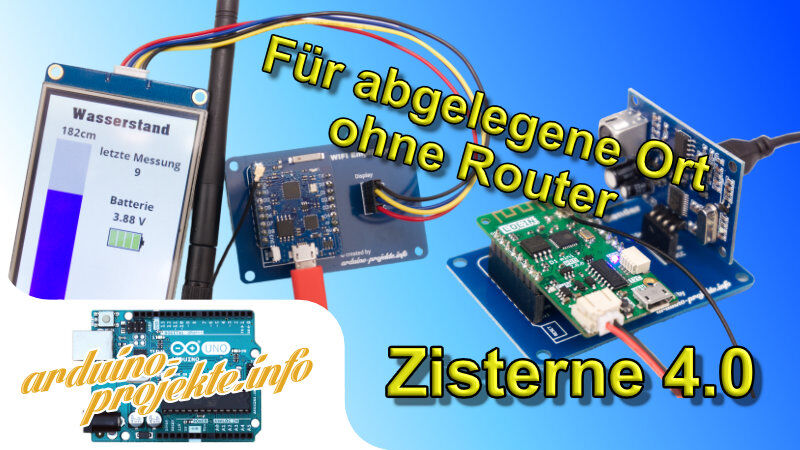
Zisterne 4.0 + Nextion Display ohne Internet / WLAN Router (UPD)
In diesem Beitrag geht es um einen Füllstandsanzeige für eine Zisterne, Brunnen oder einen Wassertank. Sicher gibt es noch viele weitere Anwendungsgebiete.
Das besondere an diesem Projekt ist, man kann es überall einsetzten wo kein WLAN / Internet zur Verfügung steht. Wie zum Beispiel abgelegene Gartenanlagen oder ähnliches.
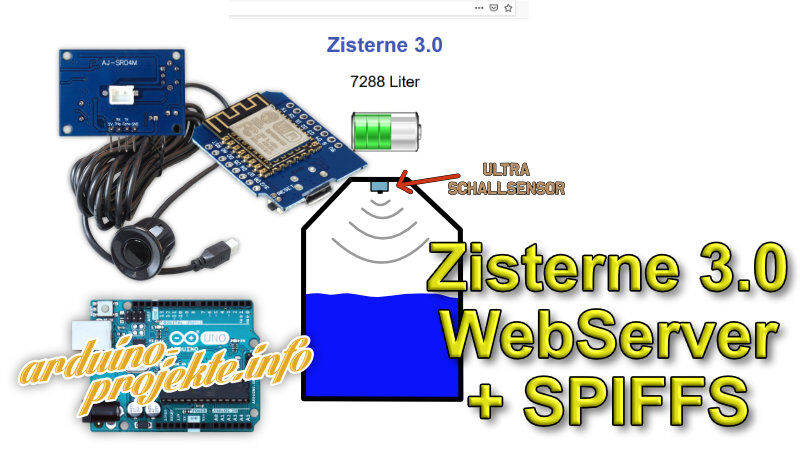
Zisterne 3.0 Web Server + SPIFFS
In meinem ersten Beitrag für die Zisterne (Wasserstandsmessung), verwende ich Batterie Bilder für den Füllstand der Zisterne. Hier werde ich immer wieder gefragt wie die Bilder angezeigt werden können.

Zisterne Füllstandsanzeige 2.0 mit Wemos Lolin32 + MySQL Datenbank
Es handelt sich hier um eine Abänderung von meiner 1. Zisternen Überwachung, den Beitrag dazu findet Ihr hier. In der 2. Version werden die Daten

Zisterne Füllstandsanzeige
Wasserstand einer Zisterne mit einem Wemos D1 mini überwachen. Hier zeige ich euch wir Ihr mit einem Wemos den Wasserstand einer Zisterne überwachen könnt.Ich habe